Introduction to Audacity
Audacity Module1 INTRODUCTION OF INTERFACE AUDACITY
As one of the sound editing tools that can be obtained free of charge, Audacity has full-featured features for simple to intermediate editing.
 FIGURE 1.1: EARLY AUDACITY VIEWS
Menu
At the very top there is a menu bar, where in File there are options for creating new files, opening past projects, importing audio files, as well as metadata manipulation. The important thing to note is Generate and Effect, because in these 2 tabs there are features that are most often used in audio editing.
Playback Buttons
Pause, play, stop, skip to start, skip to end, and record.
Navigation Tools
A collection of tools for selecting, Selection tools for highlighting specific areas, Envelope tools for adjusting the height of a chart. Draw tool is used to edit each sample point. Time shift is used to shift the sound relative to time.
Levels
Sound power level entering or exiting in db. In digital format the greatest strength that can be rendered is 0 db.
Input Output Devices
If there is more than one input device, you can choose which device to use for playback or recording. If when recording through a microphone, no sound is detected, check this section again.
2 FORMAT FILE AUDACITY
In editing, Audacity saves the edited file in the Audacity Project file which is indicated by the .aup extension. This file cannot be used by other applications and besides saving the waveform of the sound being opened, it also stores other information that can only be read by Audacity.
To save edits in another format, you can use the Export function. Export will save all changes that have been made in a standard format such as wav or mp3.
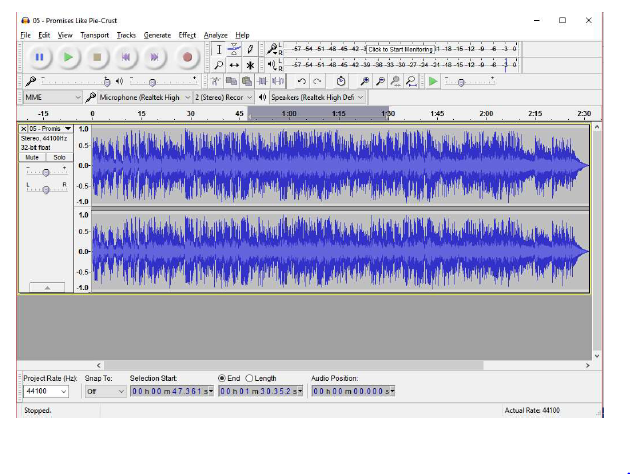 FIGURE 2.1: AUDACITY DISPLAY WHILE WORKING WITH MP3 FILES
 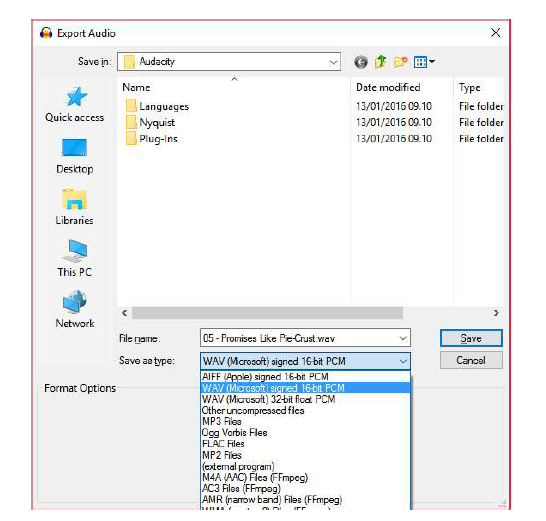 FIGURE 2.1: VIEW EXPORT AUDACITY
 In doing exports, Audacity can convert to various audio file formats. Please note that Audacity needs additional codecs to store the .mp3 file, this file is named lame_enc.dll.
3 RECORDING
To do a recording, press the button on the playback buttons. In recording, the thing to note is the level of the mic input. If it exceeds the limit, noise / crackling will occur. If this happens decrease the volume from the input.
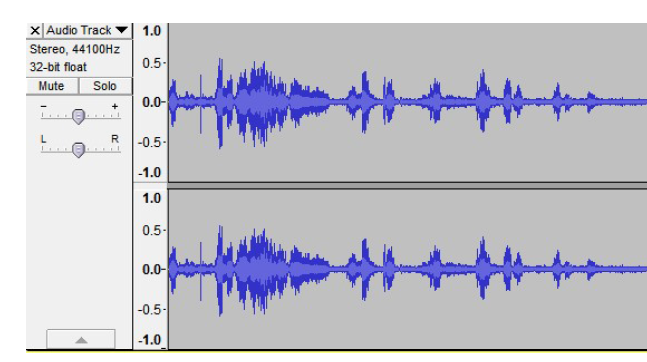
FIGURE 3.1: RECORDING RESULTS SHOW OPTIMAL VOLUME
4 CUT, TRIM AND SILENCE
Display waveform and timeline on Audacity makes it easy for us to do sound editing, almost the same as image editing, Audacity makes edits based on selection. Use the Selection tool
 to make a selection.
So that the selection can be done precisely, Audacity can zoom in and
zoom out so that the selection can be done in a split second
to make a selection.
So that the selection can be done precisely, Audacity can zoom in and
zoom out so that the selection can be done in a split second  .
. Trim function
 will cut the selected part and remove the rest of the audio clip that is not selected. Whereas Cut
  will cut the selected part and reconnect the cut off audio. To eliminate unwanted noise between each word use Silence Audio
  .
. 5 EFFECTS
Audacity provides lots of sound effects that can be directly applied to audio clips.
 FIGURE 5.1: LIST OF EFFECTS THAT CAN BE USED IN AUDACITY
 5.1 CHANGE PITCH
To use the desired effect, a selection must be made on the part where the effect will be applied. Each effect has its own settings that can be adjusted as needed. To change a male voice into a female voice or vice versa can use the Change Pitch effect.
 FIGURE 4.1: DISPLAY WINDOW CHANGE PITCH
 5.2 CHANGE TEMPO
To speed up or slow down playback without changing sound characteristics, it can be done using change tempo.
 FIGURE 5.3: DISPLAY WINDOW CHANGE TEMPO
 5.3 REMOVAL NOISE
Furthermore, in using the Effects feature is noise removal. To eliminate noise inside the sound recorded by the microphone, Audacity provides the Noise Removal tool. The most important element in noise removal is getting a sample of the noise itself, so Audacity can figure out which parts must be removed.
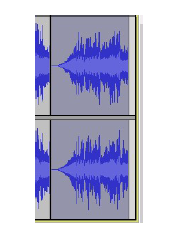
To get noise samples, record with a mic and let the recording run for a few seconds before finally starting to record sound. Then do a selection at the beginning when the mic has been recorded but you haven't started talking yet.
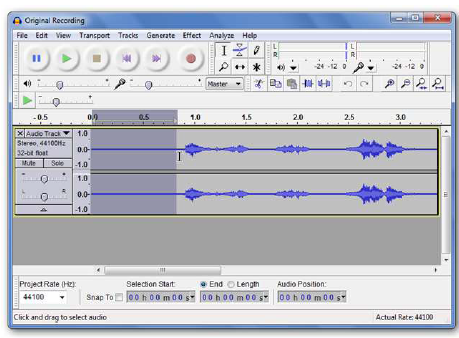 FIGURE 5.3: NOISE SAMPLE SELECTION
 After that go to Effects -> Noise Reduction
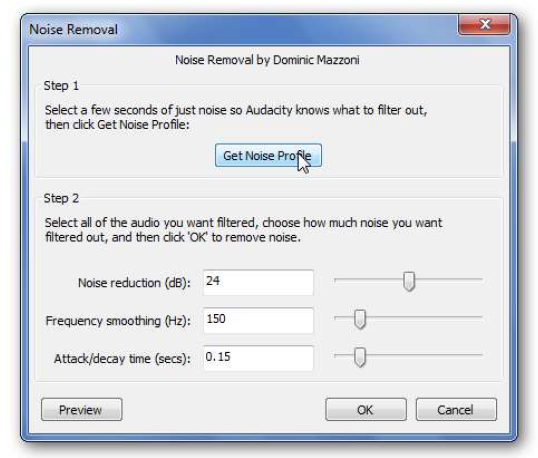 FIGURE 5.3: WINDOW NOISE REMOVAL
 After the get noise sample button is pressed, the noise removal window will disappear, but the sample profile of the noise has been saved, then return to the workspace and select the area to be filtered. Then return to Effects -> Noise Removal. The greater the number of noise reduction (dB), the more aggressive the Audacity will filter out noise with the risk of sound that does not want to be filtered will disappear.
5.4 HIGH PASS, LOW PASS FILTER, AND AMPLIFY
These two filters, when combined, can produce sounds that resemble the sounds of old radio. To get this effect it is necessary to repeat this step several times until the desired results. First, after recording the sound, select the area you want to manipulate, then choose Effect -> High Pass Filter

Leave the Frequency value fixed at 1000 Hz, and select the Rolloff value of 6B, then click OK. After that go to Effect -> Low Pass Filter
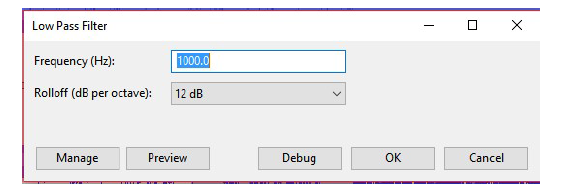
Select Rolloff 12 dB and click OK.
After the two effects have been applied, your voice recording will sound lower, so use Effect -> Amplify to restore the volume.
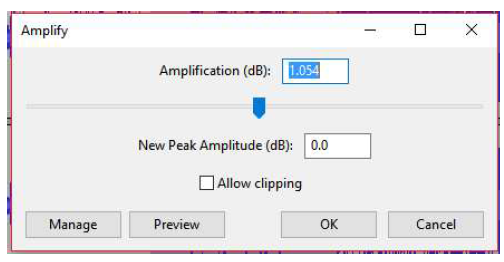
The function of the Amplify filter is to strengthen or weaken the volume of sound that is in the workspace, be careful in using this filter not to make the sound that exceeds the tolerance limit, or crackling will occur.
5.5 REVERSE & REVERB
Reverse and combined with reverb will produce a unique sound that makes it sound like it came out of another world. This effect can be applied by selecting the part of the sound that will be manipulated, then go to Effect -> Reverse
After that go to Effect -> Reverb and as an experiment, leave the default values then press OK.

Hasil pengeditan mp3 melalui aplikasi Audacity pada windows, silahkan tekan tombol download berikut :

No comments:
Post a Comment